Showing posts with label lighting. Show all posts

Thursday, June 28, 2012

Eastside Camera Club Lighting Demo

A couple of weeks ago I presented a demonstration about using one light for portraits and head shots for the Eastside Camera Club in Bellevue, WA (the meeting was actually at the Redmond Library).

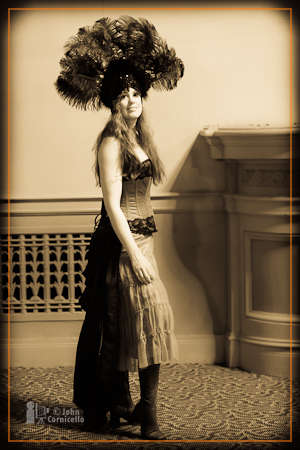
I even brought along my own model for the class
I made a lot of notes preparing for the class and thought I'd put those notes together into a PDF file to share with the attendees (and anyone else who runs across this blog post).

Lighting Demo PDF file (approx 1.3 MB)

Hope you enjoy it! If you were at the library and have questions, please post them as comments here. And let me know if you found this class and/or PDF file helpful.

Thanks!

John

Wednesday, November 16, 2011

Fashion Lighting with Matthew Jordan Smith

Wow! What a weekend. I got to assist one of my photography heroes, Matthew Jordan Smith in his 3-day workshop at creativeLIVE.


On Saturday we did some beauty shots with a simple lighting set up of one 22" beauty dish with a white sock diffuse on it directly over the camera. I was so busy, though, that day, that I didn't take any photos.

On Sunday we did a larger set for a fashion session. After that session I got a few comments and questions on Google Plus asking about how the lights were set up for that session. In reality it was pretty simple. A Profoto Magnum reflector on a standard head over the camera about 12 feet up in the air. Matthew described this as his "sun." It was bright. The first meter reading I took was f/45. We had to power that thing down to get to around f/22.


The questions, though, were about our background lights. We had four lights pointed into two v-flats. One v-flat on each side of the set. The v-flats reflected the light onto the background and blocked the light from hitting the models. We used four heads and four strobe packs to get the fastest recycle time we could. If we put all the heads into a single pack it would have taken too long to recylce the power between exposures. With it set up this way Matthew was able to fire off multiple shots in a row to keep things flowing.

To help with the clean white background from head to toe we had the models on a platform created by apple boxes and white boards. Above is a photo of the set and below is a diagram I created to show the lighting setup.


The two softboxes in the photograph are for the video cameras that were broadcasting the workshop and did not affect the still camera exposure. So you can pretend that they are not there.

Here are two photos I took on this set...


And here are photos of the creativeLIVE crew and Matthew and I that were taken with the same lighting setup and a remote camera release (that you can see in my right hand).


This was one of the best weekends I've had. Looking forward to getting myself back into the studio!

The models for this day were Briauna Mariah and Sara Cozad. Styling by Alvin Stillwell, and hair & makeup by Erin Skipley.

Saturday, October 1, 2011

If Life Is A Stage, I'd Like Better Lighting

Sorry if you've seen this from me a few times now. I've posted on Facebook and Tweeted about it. And now a blog post. This is for all those folks out there who hate red and blue stage lights. I don't know if it is a national thing, but lighting folks in Seattle seem to love their red gels. Maybe they last longer or are less expensive than other gels? I don't know. But they generally don't look good on people, unless there is a very specific effect you are going for (such as the Aerialistas at the Moisture Festival Burlesque shows a couple of years back that were all  red).

Yes, sometimes red works. But it is often over done

Princess Farhana in Hollywood posted a great blog article on stage lighting for dancers that can apply to many different theater productions. It is a great intro and reference for those not very familiar with stage lighting and a good reminder for those who have been doing it so long that they may have forgotten a thing or two. I really like the last couple of paragraphs, which I hope she doesn't mind me quoting here...
UNIVERSALLY FLATTERING STAGE LIGHTING
If you are unsure of what sort of lighting effects to ask for, or there is a limited amount of lighting in the venue, a nice, bright stage with a mixed wash of whites, pinks and ambers is a safe bet.

It will compliment any performer’s skin tone and show the true colors of costumes, props, sets and backdrops. These colors used together will warm up and soften white lights, and make the performers on stage look life-like and animated without looking harsh. A stage lit like this will also allow the audience’s eyes to take in a performance without being distracted.
Here are some local Seattle performance photos that I hope will help show that you can use other colors than red for you production.


Even black lights (UV) can work

I'd love to hear your thoughts on lighting situations you run into in theaters you photograph in. Please add your comments below.

Thanks!

Friday, September 2, 2011

Inverse Square Again


I've written about the Inverse Square Law before. But I  wanted to give a little different perspective on the Inverse Square Law here by adding a crude little video I just created with an iPhone, a white board, an LED flashlight, and some sticky notes. Let's start out with a description from Wikipedia:


The first thing to keep in mind is that strictly speaking, the law applies to light emanating from a point source. Most any photographic light we might use is much larger than a point source, so exact meter readings aren't going to happen. Where the law says that if you double the distance between the light and the subject the light will be 1/4 power, in practice it will be brighter than you expect. So please don't run off and set up a softbox, umbrella, or octabank and measure with your meter and come back saying it doesn't work. Please refer to the Wikipedia section on photography for more info.

What is more important here is the concept. Know that the closer your light is to the subject the faster it will fall off. As you move the light away from your subject, the slower it falls off. In practical situations, move your light in close to your subject if you want the background to go dark. Move the light further away if you need to even out the light (for example you want to have the background lit up or you have a group of people who are not all on the same plane with the light source).

You can almost think of light fall off similarly to depth of field. When you are in close on your subject, with high magnification, the depth of field falls off quickly. Only a small part of the scene is in focus. With the light in close, just a small part of the scene is lit and the brightness falls of quickly. When you are further away from your subject the depth of field is greater. When the light is further away, the intensity is more constant/even through the frame.

I think there is still some confusion about why light falls off so quickly. What is happening is that as the light photos stream away from the light source, they spread out in a cone-shaped pattern. The light doesn't really get dimmer, but the photons have to spread out further to cover the area of the cone pattern as they move away from the source of the light. As they move away the rays start to get more parallel and at that point the falloff stops happening. To show that the light is not getting dimmer, think of a city skyline in the distance. You can see the lights in the windows of the buildings when you are miles away. But there isn't any chance that those lights are illuminating you when you are at a distance. Same thing with an airplane flying overhead at night. You can easily see the marker lights on the plane at their point of origin, but they are too spread out by the time they actually reach you to have any effect on lighting you.

Think of the sun and earth. If we were able to be close to the sun the light skimming across the planet would be much brighter on one side than the other. But due to the distance between the sun and earth the light rays from the sun are reaching us in a parallel fashion. The light on the top of a mountain is the same intensity as at the base of the mountain if there is nothing blocking the light and causing shadows. When you stand on a beach and look out to the horizon, the brightness remains constant. You can see a ship off on the horizon many miles away. It doesn't fade into darkness until the sun goes down. The same amount of light hits the sand where you are standing as hits the ship on the horizon.

Here is the video:


For this demo I've set up a small LED flashlight as the light source. It is not a point source, but I think it should do for the demonstration. 

At first I have it set at 6 inches from the whiteboard and I have drawn a circle around the light hitting the board. Next. I moved the light back to 12 inches and drew another circle. This should start making things click if they haven't already. Note that the light expanded in all directions when I moved it back.

Then I added another element--sticky notes. I have one here that is approximately the size of the original circle that I used to cover that inner circle. How many sheets of paper will we need to cover the larger circle caused by doubling the distance of the light to the white board? At first you may be tempted to answer TWO. Seems reasonable. Double the distance equals twice the size. But that is incorrect. The light beam is expanding in all directions, so to cover the second circle I needed 4 pieces of paper. The light has spread out so that is is 1/4 the intensity at twice the distance. If I doubled the distance again so the light was four times the distance, it would take 16 pieces of paper to cover the circle.

I hope that this gives a little clearer demonstration of what is happening to the light beam as it expands as it gets further and further away from its source.

Here are a few more links with photographic demonstrations… This Week in Photo; Mark Wallace's YouTube video; and WikiPedia.

Thursday, July 21, 2011

Round or Square?

Catchlights that is.

Catchlights are those highlights that give life to your subjects' eyes in your photographs. Without a catchlight, the eyes can look lifeless. So much so, that in the old days of glamor and hollywood portraits they would paint in catch lights if the lighting setup didn't provide them.

Every once in a while I get into a discussion with other photographers about catch lights. Some people like round ones. Others like rectangular. I fall into the "rectangle" camp and would like to offer my reasons. I also like LARGE round catchlights, such as from a large octabank. See my next post for more about that.

When I think of catchlights, I think of old masters paintings. And I think of light coming from a window or a doorway. And in most situations, those windows and doorways are rectangular. But what about the great outdoors? The catchlight in the great outdoors is often provided by the full sky. And that tends to be rectangular in shape.

Other folks say that the catchlight should be round. They say the main source of light in the world is the sun, and the sun is round. I don't disagree, the sun is pretty much round. But the sun rarely provides a catch light. For one thing, it is so far away that if it does show in the eye, it is just a pin-point. And if the sun is shining directly into the subject's eyes, their probably squinting and not looking all that comfortable, and the squint may be blocking the catchlight. Or it is so bright that the subject looks away from the sun, and now the wide open sky provides the light for the scene and the catchlight.

So, there's my argument. But, as with all things, it doesn't matter what I think. It doesn't matter what other photographers think, either. It just matters what you think. You like round catchlights? Use round lights or modifiers and be happy. You like rectangles? Use rectangular lights or modifiers and be happy.

All I ask is that you think about it and reason out why you have one preference over another. And maybe you don't have a preference. That's OK, too.

And now you get to look at my pretty face (that's what happens when the model has to cancel at the last minute)...

This first image was created with a Photoflex Silverdome NXT Medium Softbox. Below is a close up crop of my eye from the above photo.

This second photo was taken using a Speedotron 22" beauty dish with a diffuser on it. Below is the close up crop.

This third image goes back to the Photoflex softbox, but I added three strips of black tape across the face of the softbox to try to imitate the look of a window. Again, below is the close up crop.

What is your preference for the shape of a catchlight? And what do you think of multiple catch lights, as you might get from some multiple light studio setups? The above photos were all made with one light and no fill, so only show the single catchlight in each eye. A reflector board or secondary fill light may have added an additional reflection in the eye.

For this image, I kept with the Photoflex softbox, but added both a white card and a Photoflex 32" 5-in-1 MultiDisk reflector with the gold covering, which provided an extra reflection in the eyes (as well as a warmer overall tone to the image). In this case, I don't think it detracted. But if the extra reflections were harder and more similar to the main catchlight I would suggest removing the extra catchlights in retouching.

Speaking about catchlights and portrait lighting, the catchlight is what we call a specular reflection. It reflects the light back to the camera like a mirror. And like a mirror, the brightness will remain the same, no matter the distance between the light and the subject. At first, this seems to contradict the inverse square law, but it actually doesn't. The inverse square law says that when you change the distance between the light and subject, the amount of light will change by the square of the change. So, if you moved your light from 2' to 4' from the subject (2x the original distance), the subject would receive 1/4 the amount of light. If you moved the light 3x the distance, the subject would receive 1/9 the amount of light.
In the case of a mirror reflection, instead of the brightness changing, the size of the light will change. So if you move the light twice as far back, instead of the light falling off to 1/4 power, the size of the light in the eye would be 1/4 the size, but at the same brightness. Knowing this, we can control the brightness of the catch light. To make it darker in the overall exposure, you would have to bring the light in CLOSER. By bringing it closer, the catchlight gets bigger, but remains the same brightness. However, by bringing the light in closer the overall scene (the face) gets brighter. And you have to lower the exposure (stop down the lens or lower the power of the strobe) to get the proper overall exposure, and by doing so, you are also darkening the specular reflection, bringing closer to the overall exposure level.

Remember to check my follow up post about larger catchlights.


All images taken with a Canon 5DmkII and Canon 70-200L f/4 IS lens. Manual white balance setting of 5700 degrees Kelvin was set in the camera. Light was a Speedotron Force 5 monolight that remained the same spot for all images (just the modifier was changed between the softbox and the beauty dish. With a little bit of work the Speedotron beauty dish can be modified to fit onto other strobes, but you are on your own for that. At around $150, this beauty dish is a bargain.

Thursday, June 2, 2011

Lighting demo at Seattle Photographic Society

iPhone capture, processed in Instagram

This past Tuesday (May 31) I had the opportunity to present a 2-hour lecture/demo on "simple" lighting for the Seattle Photographic Society. Basically, it was about using one light, though we did expand to two lights near the end of the evening. This blog post isn't meant to be a class on lighting, but contains some notes and concepts I wanted to reiterate for the folks who were in the audience that night. 

I started talking about quality of light in terms of hard or soft. The larger the light source, the softer the light. The closer the light source (which makes it larger in relation to the subject), the softer the light. The presentation started with an on-camera flash demo. In the image on the left side below you can see what this looks like. Relatively flat light with a hard shadow under the chin. I then took the flash off the camera (via a Canon Off Camera Shoe Cord 2) and held it off to the side to create the image on the right. The light size didn't change (small), so the shadows are still hard. Bu there are shadows now that give more shape/dimension to the subject. Instead of the flat face we now have a nicely shaped, thinner looking face.

The next step was to put the flash back onto the camera, but I turned the flash head to the left and held a small (12") collapsible gold-color reflector out to the left for the light to bounce off of. The reflector became the light source on the subject, and although it was still about the same distance from the subject, it was many times larger than the bare flash head, providing a softer light that wrapped a bit around the subject as seen below. The lighting diagram below the image shows the setup.

on-camera flash pointed to the left bouncing off hand-held reflector
The next setup moved from flash to constant lights in softboxes. I tend to use flash for my own work, but for a demo like this I'll go to constant lights (equipment list at the bottom of this post) so that the audience can better see what is happening and they can come up and take photos with their own cameras without having to get synced up to the strobe(s).

I started out showing what I think is a common mistake people new to studio lighting often make. I set up small softbox about 6 or 7 feet away from the subject. At that distance the softbox is a small light source, giving strong shadows. In the three images below you can see the small softbox image on the left. I think the shadows add to the image. And they are softer than the shadows seen in the direct flash photos in the first example above. The other two images below show a larger softbox moved in closer. In the middle example the light is pointed at the subject. In the example on the right the light has been turned to point in front of the  subject so it feathers across the face. The diagrams below show the light setup for the middle and right images.


Bring the light in closer to reduce specular highlights
Another important concept that I wanted to show here with the lights at different distances is the effect on specular highlights. We are usually presented with a mix of diffuse and specular highlights. Diffuse highlights are basically all of the lit area of the image. They define the subject. The effect of the light on diffuse highlights is that as the light gets closer, the subject gets brighter. As the light is moved away, the subject gets darker. See previous post on the Inverse Square Law. Specular highlights are mirror-like. They might be the reflection (catch light) in the subject's eyes, or the reflections from oils on the skin, or the reflection of the light on a cylindrical product shot. These highlights do not follow the inverse square law. As mirrors, they are always as bright as the original light source. 

So, when your light is far away from the subject it has to be much brighter than when close in to give the same exposure.  When the light is further away, the specular highlights are brighter. As the light gets closer we can lower the light output causing the specular highlights to be diminished. The brightness can be controlled in a variety of ways. With constant lights you can stop down (stopping down the lens is usually the least desirable option because it changes the depth of field), change shutter speeds, or add diffusion or neutral density gels in front of the light. With flash the shutter speed won't matter, but you can use the gels, aperture, or you can turn the power down.

Go ahead and read the preceding two paragraphs again. They cover an important concept that I don't see talked about often enough.

For the next section of the presentation I moved the light to the front, directly over the camera and straight on to the subject. This is a classic beauty light position, sometimes called butterfly or paramount lighting. In the image on the left I just used the one light with no fill cards. On the right I added a white reflector under the subject's chin to soften the shadows. When working with a light in this position pay close attention to the eye sockets. If the light is too high for your subject the brows may cast a shadow, darkening the eyes. Lower the light to fix that.

At this point, someone asked about eyeglass reflections. I put my glasses (which do not have an anti-glare coating) on the mannequin and moved the light slightly around to the camera's left, as shown in the left image below. You can see the reflections in the top of the glasses. In the image on the right I raised the light a couple of inches to remove the reflection. Another option, if raising the light caused unwanted shadows from the brow, would be to slightly tip the glasses forward, aiming them down, by lifting the arms of the frame off the subject's ears.


We ended the section with a couple of quick demos to show short lighting vs broad lighting. Basically, if the subject's nose points towards the light, you have short lighting. If the nose points away, you have broad lighting. Short lighting is the safe way to go for almost everyone. It narrows the face and gives good modeling.
 

To quote Rolando Gomez instructing a model, "the lens is your friend and the light is your friend. Keep your nose pointing at either of them or between them and you will look great." Or, as Zack Arias says, "Eyes to the light!"
And finally a quick demo of what a fast lens can do. These (below) are basically the same photo, but the one on the left is at f/4.0 and on the right is at f/1.8, with only the eyes in focus. For the image on the right the camera was also raised slightly (making the eyes larger and the chin smaller) and moved in slightly (making the face appear narrower by making the ears appear to be further back).

Again, this post isn't meant to be a lighting class. This is a refresher for those who were in the audience. I am available to present lighting classes. Email me for more information and rates for classes if interested.


All images in this post were taken with a Canon 5DmkII with an 85mm f/1.8 lens. Most images were taken at f/4, except where noted. ISO was 800. Shutter speed varied. The flash photos used a Canon 550EX flash. The remaining images were lit with a Photoflex StarLite QL with a Coolstar 150 CFL (fluorescent) bulb in a SilverDome nxt medium softbox (available as a kit) and/or a WhiteDome softbox.

Sunday, April 3, 2011

Find the light!

One of the difficult concepts to me way back as a young photographer was to find the open shade for great portraits. I think part of the problem was another concept, to get in closer. I could find nice open shade, but there was usually some bright direct light in the background or crossing through the image. But I eventually caught on. Here are some "behind the scenes" photos from the Moisture Festival that I've been photographing the past few weeks. A few of these are outside in the sun, some are backstage, and two are taken in a very dark theater.

For this and the next photo, my subject was
in the theater, but next to a large
door that let in skylight.
Sort of makes a gigantic ring light
as the door is right behind me.


This and the next photo are of volunteers
working in the ticket booth outside the
venue lit by indirect skylight


This photo was taken backstage
using a lighted mirror behind me
as the light. Again, like a ring light

These last two photos were taken
in a different theater that was almost
totally dark except for some light sconces
way up near the ceiling. I had my subject
stand where the light was falling and
had her turn towards the light.

Tuesday, March 22, 2011

Man, Those Lights Are Hot!

I received a few questions about what lights we used in the Bambi Cantrell workshop at CreativeLIVE this past weekend.

One of the questions was how did we connect the camera to the lights to sync them. We didn't. For this workshop we used continuous hot lights. We used a mixture of Bambi's Chimera Triolets and my Photoflex Starlites. These lamps can use either a tungsten bulb or a fluorescent bulb. The tungsten bulbs are rated at 3200° Kelvin and the fluorescent bulbs are 5600° Kelvin (daylight). The tungsten lamps run extremely hot and you need to have leather gloves on if you need to make adjustments. They are available in various wattages from 250 to 1000 watts. We used 500 watt lamps in the two strip lights and the medium softbox, and we used a 1000 watt lamp in the Octabank. The fluorescent lamps run much cooler and are easier to handle. The one pictured below (not used in the workshop) is 150 watts, and puts out about the same amount of light as a 450 to 500 watt tungsten lamp.

Chimera Triolet lamp head with a 500 watt tungsten lamp mounted in a softbox.
Photoflex Starlight QL with a 1000 watt tungsten lamp
Photoflex Starlight QL with a 150 watt fluorescent lamp
Using continuous lighting means that we don't have to sync up the camera shutter with a flash. These are like big-brothers to your standard household tungsten and fluorescent lamps. They have advantages and disadvantages when compared to strobe lighting:

Advantages:
  • Continuous. You see exactly what you are going to get. Easier to use for photographers who are new to studio lighting.
  • Inexpensive. Relative to high end electronic flash units.
  • Brightness. Not as bright as strobes. You can easily work at low apertures (1.4, 2.8, etc.) to get limited depth of field much easier than you can with high powered electronic flash.
Disadvantages:
  • HOT! You can easily get a bad burn if you grab the head or bulb before it has had a chance to cool off
  • HOT! Used in close to your models, they can become uncomfortable.
  • HOT! If you are photographing food, the lights can dry out the subjects.
  • HOT! You need specially designed soft boxes that can withstand the heat and not catch on fire.
  • Brightness. Even at 1000 watts you need to use high ISO values (400 or more), which can lead to grain/noise issues. You are also limited to slow shutter speeds, which can lead to camera shake if you don't have steady hands or a tripod.
Electronic flash units (also called strobes) often have tungsten modeling lamps to help see how the light falls. These can range from 100 to 500 watts, so they can run hot, too. But most flash heads that use modeling lamps have fans in them to help keep them cool. Neither of the continuous lamp heads we used had fans.

An important thing to keep in mind when working with tungsten lamps is to not touch them with bare hands/fingers, even when cool. The oils on your skin will transfer to the quartz glass which can lead to a weakening of the glass, which can lead to premature failure of the bulb or even to the bulb exploding. Not something you want to happen, especially if you have a human subject on the set. The 1000 watt bulb you see in the photo above has a protective glass enclosure around the quartz glass, so it would be OK to touch.

Here you can see a typical 150 watt tungsten halogen modeling lamp that is made of quartz with no glass cover. Do not touch this type of lamp with bare hands:

And here is a 1000 watt bulb that doesn't have a glass cover which shows the effect of having been touched:

If you have any questions about the equipment we used in Bambi's workshop on CreativeLIVE please send me a note and I'll do my best to answer it.
Thanks!
John

Tuesday, March 8, 2011

Total Confidence -- Zero Ego (Take 1)

I want to start this article off with a big thanks to Celeste Olds and the CreativeLIVE crew and to Vincent Laforet and his crew of Marcus Del Negro and Justin (sorry, I never got your last name).

This all started a little over a week ago. I was in Las Vegas at a Scott Bourne and Bambi Cantrell workshop and I received a message from Celeste that she wanted me to come in as a gaffer on the Laforet workshop. My initial reaction was panic. Gaffer? I'm a still photographer. Yes, I can light things. But I don't know all the technical terms that the film industry uses. I use extension cords, not stingers. I called Celeste on a break and expressed my doubt. She kindly ignored it. So I told her, OK, I'll call Vince and talk to him and see what he thinks. Celeste told me to go ahead and call, but don't sell myself short. At this point I'm still thinking that Vince is going to ask me some questions and say, "Next!" But I moved ahead with it.

I called Vince. I told him I was a "stills guy" but had done some work on a 48-hour film and some other set lighting. He asked for my website and said he would call back in a few minutes. He did. He mentioned that we'd be going for a film noir shadowy look in one of the pieces for the weekend, he liked the lighting on some of my figure photography. And then he  asked to have Marcus call me back to go over the gear list. Uh, Oh! Sounds like I'm in.

I worked with Celeste and Adam at CreativeLIVE to assemble their gear and some extra equipment rented from Glazer's Camera in Seattle (just a few blocks from the CL studio). We were able to get some of the things that Vince and Markus requested. We also had some equipment similar to their requests. Not quite everything, so still a little nervous.

Vince and I got to meet for the first time on Wednesday evening. We looked at the spaces available and decided on the daylight side (Chase Jarvis's studio) for the documentary and on the CreativeLIVE side for the narrative. A little relief! The lighting for Saturday was going to be relatively easy. But the narrative...

As Vince mentioned on Sunday, there were a number of challenges. We had a 20' foot ceiling and no lift or tall ladder. We wanted to light directly from above with a spot and some diffusion. But that just wasn't going to happen considering time and budget. What to do. We will light from off to the side and high up. We had light stands that could go up high enough. But what about adjusting the light? This is where it got scary. CreativeLIVE has a balcony in the studio. So I mounted a heavy ellipsoidal spot light that I brought from home on a Hi-Hi stand with a heavy duty boom arm. Loaded the base with sand bags, enlisted a couple of other folks from the crew and hoisted the light up to the height we wanted. I then rolled the still top heavy stand over to the balcony. Made adjustments, rolled it back to the set. Changed my mind. Rolled it to the balcony, final adjustments, back to the set. Standing on the balcony was OK, but holding onto the light as it swayed back and forth way up there was disconcerting. It was just as bad on Sunday night when we disassembled the set. It wasn't a paralyzing height fear. I was able to do what I needed to do. It was just plain uncomfortable. Even more appreciation now for all my aerial artist and rigging friends. You are all amazing.

Anyway, I've now gone totally off my original topic/theme for this post. I started with thanking the crew and wanted to talk about being on a crew and how different it can be from still photography working on your own. I guess another post is coming up later today. But I do want to reiterate my thanks to Vince, Justin, and Marcus for making me feel totally a valuable part of the crew. Thanks, guys!!!
Sure wish I had taken some photos of us setting up. But we were on a tight schedule, staying around til after 11pm on both Friday and Saturday nights to get the sets constructed and lit, while anticipating an 8am call time the next day. So I appologize for all this text.

Monday, March 7, 2011

Creative Live and Vincent Laforet day three - narrative drama


On Sunday, March 6, I was the gaffer on a CreativeLive workshop with film maker Vincent Laforet. If you read my last post you know that on Saturday we filmed a short documentary that we lit with a mixture of window light and daylight balanced lighting units.

On Sunday we moved over to another set and worked with tungsten lights. I didn't get to take many photos (just the one above) on this set because it was much more complicated and I had to keep on my toes during set up and filming. But I've drawn out a diagram of the set here:
You can see that we had three walls. The back wall was a bank of windows that we covered up with sheets of foam core to keep out the daylight as it would have overpowered our set lights and gave everything a blue cast because we were color balanced for the much yellower tungsten lights.

What Vincent really wanted was to have an overhead spot light over the desk. But we had 20+ foot ceilings with no access to a power lift or a giant ladder. So we used a 1000 watt ellipsoidal spotlight (#5 in the diagram) on a very tall C-stand pointing over the wall we had built on the left side of the set. This was probably the scariest part of the workshop. We had this heavy light raised about 18 feet into the air. Moving that light stand around to position it was tricky. We had three of four sandbags on the base to lower the center of gravity. I'm glad we've taken that light down and don't have to deal with it any longer.

We then added 4 650-watt DeSisti Fresnel spots with barn doors for accents. I wasn't able to find the DeSisti lights to show, but they are very similar to these Arri Fresnel Lamps that I have used on other projects. #1 pointed at and skimmed the brick wall behind the desk, illuminating the side of the clock on the wall. That still left the clock face dark, so #2 was added to light up the clock. #3 provided a pool of light on the packages on the desk and filled in some shadows on the front of the desk. #4 added a slash of light diagonally on the wall and was aimed at the door handle.  You can see two of these 650s in the photo at the top of this post above the crew members.

As one of the actors was going to be filmed at the door, we added a 1000 watt light in a 12"x50" strip light (a narrow softbox) above the door, pointing down to his position. The lamp head was a Photoflex Starlight QL in a Westcott strip bank.

This was our basic set up for the establishing shots and the action shots taken looking towards the desk. When we turned the camera around to to the reverse angles (seeing the female actor's face, and the male actor going to and from the door) we added a Litepanels Bi-Color light in beauty light position (almost directly over the camera) for the female and re-purposed light #2 from the diagram to point towards the door in the wall, being diffused by the 4'x4' opal diffusion screen that we used yesterday with the 800w HMI light for the male to light his face and separate him from the background wall and door. The Litepanels Bi-Color allowed us to dial in the warmer color temperature we needed to balance with all the tungsten lamps on set.

We then finished up detail shots, such as a closeup of the male actor's hand going to the telephone and a close up of the packages on the desk using the Litepanels and moving them around as needed to give the light we wanted.

At this point, I don't know if the narrative will get edited and uploaded. If it does, I will be sure to post a link to it in a future blog. But in the meantime, I have a couple of YouTube videos showing the crew blocking the scene and the actors in place: