Thursday, November 17, 2011

New Vision Dance 2011

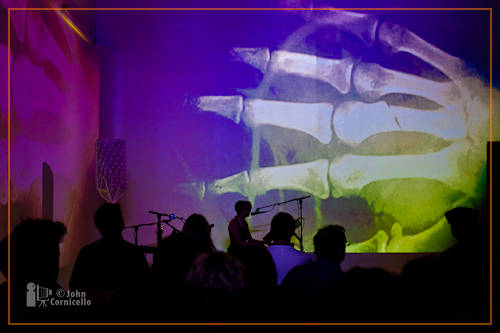
For the second year I've had the pleasure of photographing the New Vision Dance Company's fall show.


Here are a few of my favorite photos from the show. Dance can be tricky to photograph as I have no control over the lights and always want the lights to be someplace other than where they are. In this case, most of the lights were at floor level which looked great for the audience, but presented a few challenges for getting the the photos I wanted. But I think I did OK.

You can find more in my New Visions Dance galleries from 2010 and 2011.


All photos taken with a Canon 5DmkII with the following lenses: 50mm f/1.4, 100mm f/2.0, and 24-105mm f/4.0.

Wednesday, November 16, 2011

Fashion Lighting with Matthew Jordan Smith

Wow! What a weekend. I got to assist one of my photography heroes, Matthew Jordan Smith in his 3-day workshop at creativeLIVE.


On Saturday we did some beauty shots with a simple lighting set up of one 22" beauty dish with a white sock diffuse on it directly over the camera. I was so busy, though, that day, that I didn't take any photos.

On Sunday we did a larger set for a fashion session. After that session I got a few comments and questions on Google Plus asking about how the lights were set up for that session. In reality it was pretty simple. A Profoto Magnum reflector on a standard head over the camera about 12 feet up in the air. Matthew described this as his "sun." It was bright. The first meter reading I took was f/45. We had to power that thing down to get to around f/22.


The questions, though, were about our background lights. We had four lights pointed into two v-flats. One v-flat on each side of the set. The v-flats reflected the light onto the background and blocked the light from hitting the models. We used four heads and four strobe packs to get the fastest recycle time we could. If we put all the heads into a single pack it would have taken too long to recylce the power between exposures. With it set up this way Matthew was able to fire off multiple shots in a row to keep things flowing.

To help with the clean white background from head to toe we had the models on a platform created by apple boxes and white boards. Above is a photo of the set and below is a diagram I created to show the lighting setup.


The two softboxes in the photograph are for the video cameras that were broadcasting the workshop and did not affect the still camera exposure. So you can pretend that they are not there.

Here are two photos I took on this set...


And here are photos of the creativeLIVE crew and Matthew and I that were taken with the same lighting setup and a remote camera release (that you can see in my right hand).


This was one of the best weekends I've had. Looking forward to getting myself back into the studio!

The models for this day were Briauna Mariah and Sara Cozad. Styling by Alvin Stillwell, and hair & makeup by Erin Skipley.

Tuesday, November 15, 2011

Aspect Ratio


...or why can't I print a full frame image on standard paper sizes

Aspect Ratio is the ratio of the short size of an image to the long side of the image. We talk about it all the time without realizing it. When you get a 4x6 inch print you are describing the aspect ratio of that print: 4x6 (or 2x3, or 1x1.5). The length long side of the image is 1.5 times the length of the short size.

This happens to be the aspect ratio of most digital SLR cameras. These cameras evolved from 35mm film SLR cameras. 35mm film actually measures 24mm x 36mm (do the math, that translates to 2x3 or 1x1.5). Hence a 4x6 print can show the entire frame from a 35mm slide/negative or from most dSLR cameras. I say most because Olympus has SLR cameras with a 3:4 ratio, and most compact digital cameras are also in the 3:4 ratio. But that is not typical for dSLR cameras. I will talk about 3:4 ratio at the end of this post.

So, what happens when you want to make an enlargement from your dSLR image? If you make an 8x12 enlargement you will get the full frame. Everything you originally saw in the image. But, you might be saying, most frames are available in 5x7 or 8x10 sizes. What happens when I make a 5x7 or 8x10 print? What happens is that you either have to crop off parts of the original image, or you have to print with uneven borders (the borders on the long dimension will be wider than those on the short sides. The physical dimensions/aspect ratio of the image and the frame are not the same. Something has to go.

Here is an illustration:


The red line indicates the full 1x1.5 ratio of the dSLR original file. The other lines show the area of the image that will be included in various size prints.
The green lines shows the crop for an 8x10 or 16x20 (1x1.25 aspect ratio). Notice that a relatively large section of the original will be cropped out to make an 8x10 print.
The blue lines show the crop area ofor a 5x7 print (almost the full frame).
The yellow lines show the approximate crop area for an 8.5x11 or 11x14 print.

As mentioned above, there is an alternate way to print. You can have uneven borders, as shown here:


Here you are printing the full image frame (shown by the green lines) on 8x10 paper (red outline) at a size of about 6.67 inches by 10 inches, leaving a wide white border along the long dimensions of the print. I would never deliver a print that showed the uneven borders. I would have it mounted in a mat cut to the appropriate size and shape to display the full frame image and hide those white borders behind the mat.


Here (above) the red frame shows the full image as captured by the camera. The green frame shows the part of the image that can be printed as an 8x10 inch print. Of course that green frame can be moved left or right in the image for the best composition.

Another way to think about this is to divide the long dimension of your original image by the short dimension and then divide the long/short dimension of your frame size and see if they match up. For example, take your original image that is 2:3 ratio. Divide 2 into 3 and you get 1.5. Now take your frame size. First we will try an 8x12 frame. 12 divided by 8 equals 1.5. The number is the same. The original image will scale to 8x12 with no cropping necessary. Second we will try an 8x10 frame. 10 divided by 8 equals 1.25. This does not match the original 1.5, so the image cannot be scaled to 8x10 without cropping.

One more illustration:


Note the black diagonal line from corner to corner of the image. That shows various crops within the image that will maintain the 1:1.5 aspect ratio. The green border and diagonal line indicate the available 8x10 (1:1.25) crops available from this image. Any rectangle who's corners fall on the diagonal green line can be a 8x10 crop from the image.

Here are the some common aspect ratios and print sizes:
Aspect RatioSample Print sizes (no cropping required)
1:1.52x3, 4x6, 8x12, 16x24, 20x30, 32x48
1:1.254x5, 8x10, 16x20, 24x 30, 32x50
1:1.311x14
1:1.45x7

Of course, you can use standard frame sizes and cut custom mats to allow your prints to have a slightly different aspect ratio than the frame. How much different they can be is a personal choice.

3:4 Ratio -- or the 4/3 systemTraditionally, televisions and personal computers have had screens with a 4:3 (width to height) aspect ratio. Computer screens have come in 640x480, 800x600, 1024x768, 1280x960, etc. As compact digital cameras were being developed the 4:3 ratio was adopted by most manufacturers. This way digital camera images fit the computer screens. But they don't fit traditional photographic printing paper sizes.

Here is a 4:3 aspect ratio image with 8x10 (green) and 5x7 (blue) crop guides on it.


The 4:3 aspect ratio translates to 1:33333 and gives you uncropped print sizes like 10.5x14, 9.6x12.8, 
9x12, 7.5x10, or 4.5x6. Not your typical print sizes. But these do work well for online, full-screen presentation.


This is a re-run of an article I originally posted on my web site about 4 years ago.

Saturday, November 12, 2011

Embodied

This week I was lucky and honored to be able to photography a multi-media one person show by Courtnee Papastathis at the FRED Wildlife Refuge in Seattle.


The show was a mix of aerial, music, and video projections. I've known Courtnee as Zita the Aerialist for some time. But now I got to see/hear/experience her great voice and musical talent as she performed with guitar, ukelele, and synthesizer.

Here are some photos of the performance...


Wednesday, November 9, 2011

Perspective (again)

I've been seeing some tweets and Facebook messages about how lenses affect perspective and the drawing of the human face. My argument is that the lens doesn't cause the different look, but rather the distance from camera to subject does. The lens focal length just determines the angle of view or what fits into the frame. I could refer you to my previous blog post from this year on this. Or the one before that in 2009. Or even a post from 2007. But no, I'm going to write it all up again for your enjoyment.

I'm not saying that you should photograph everything with a short lens and then crop later to get your composition. But I am saying that you should determine your camera to subject distance to set your perspective and the relationship between items in the photograph and then select the lens focal length that fills the frame appropriately. Don't blame your lens(es) for perspective distortion (expansion or compression of the scene).

Here is a set of 3 images. I'm using a mannequin here instead of human so that there would be no movement between the photographs. One was taken with a 200mm lens, one with a 35mm lens, and one with a 16mm lens. The fourth image takes the 200mm and the 16mm images and combines them in separate layers in Photoshop. I then set the blending mode to "difference" to show how the two images compare. The pixel and noise structure of the two images accounts for the variations inside the facial area. But if you look at the outline of the face, you will see that it is exactly the same in both images. Changing the focal length did not change the perspective. Can you tell which image was taken with which focal length lens?

200mm and 16mm images overlayed
on each other in Photoshop's "Difference"
blending mode. The facial shape and
features are the same.

Here are the full frame originals to show the size differences due to the various lens focal lengths...
200mm lens from 8' away
35mm lens from 8' away
16mm lens from 8' away. Notice that
the relationship between objects
in the scene are the same even with
the widely varied focal lengths used

And to round out the comparison, here are three photos taken with the 200, 35, and 16mm lenses where the camera to subject distance was changed to try to maintain the approximate same size of the face in the frame.

200mm lens from 8' away. Facial features
are flattened. Nose, eyes, and ears are
all similar in size. The face appears slightly
wider than "normal"
35mm lens from about 2' away. Facial
features are more pronounced. The nose
is larger than the ears. The face is
narrower than "normal"
16mm lens from a few inches away.
Facial features are even more distorted.
The nose comes forward, the ears are
much smaller. The face is much narrower
than "normal"

Once again, I'm not suggesting that you take your portraits with a short lens from far away and then crop. I just want to show and help understand that camera to subject distance is what affects the perspective in a photograph. Too often the lens gets blamed for this. Select the appropriate lens for the situation.

Remember, a shorter lens doesn't cause the perspective change. But it does allow you to move in closer so that you get that distortion. And a long lens doesn't compress depth. Blow up the center section and you will find they match (like in the first three images above). Photographs taken with different focal length lenses, but from the same camera position, show exactly the same perspective in the section of the scene that is common to all the different angles of view of the various lenses.

Thanks for putting up with this again!